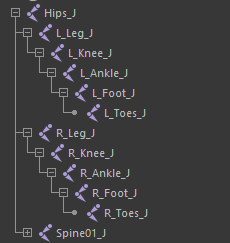
Adding Joints
The first step before creating the animations was creating a rig for the character so that the character’s joint are able to be moved and keyed in the software.
To do this I had to create joints from Maya’s rigging menu and place them where I want the character to bend and twist, this being the hips, chest, arms, fingers, legs and neck. It is important to note that the joint’s transformations should be frozen so that it won’t negatively affect the rig later into the project.

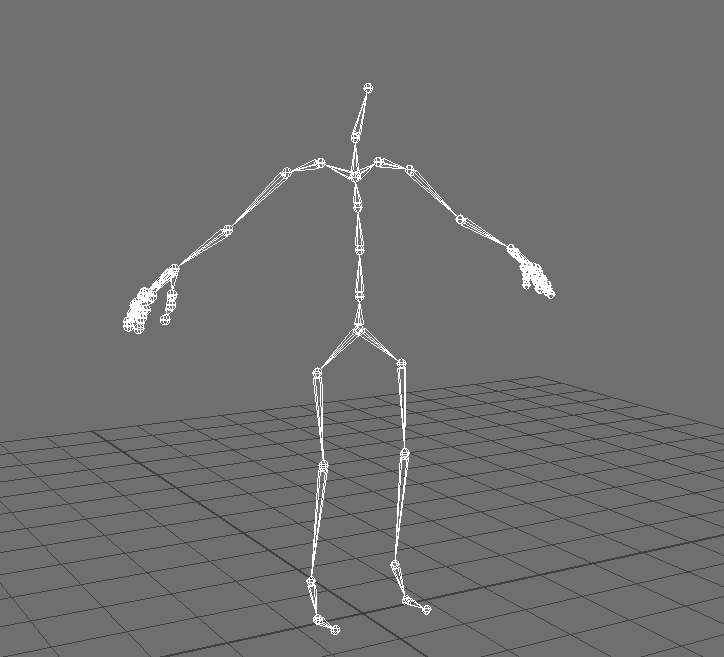
Creating the IK and Skinning
Next up is to create the IK for the character, this is to make it much easier to control the pose of the character when animating by restricting the arms and legs of the character from stretching to abnormal levels. The method of setting up the IK is quite simple.
I did this by selecting the leg or clavicle with the create IK tool and then select the ankle if it’s the leg or the wrist for the arm, and then it’s set up. All that was left to do was to set up the rest of the IKs for the spine, arms and legs.
So I have implemented the joints and IK for my character into the scene, but moving these joints will not move the character mesh since they’re not connected.
To skin the mesh to the skeleton I open up the skeleton dropdown in the rigging menu after having the hip joint (the parent of all the other joints) and mesh selected, then selecting the “Bind Skin” option.

Doing this will generate weight paints onto the mesh that are connected to the different joints. The allocation of these weight paints are based on their vicinity to each joint.
Setting Up Controls
For setting poses for characters in Maya, controllers are recommended to make it easier since you won’t need to manipulate the joints individually. For my character, I made controllers for the feet, neck, chest and hips.
These controllers were made using nurbs that I then edited the outline of by moving the vertices to outline are body part it was surrounding.
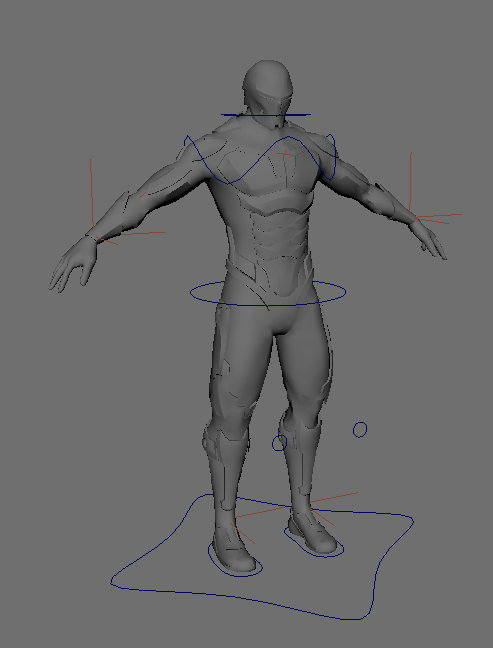
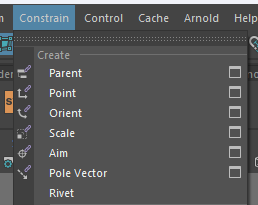
But like the joints at this point the character will not move if these controllers are moved, so after freezing the transformations I added constraints to these controls to connect them to the joints and IKs that I want to be affacted.
In addition to the controls listed before, I added elbow and knee controls to act as points these joints will be pointed towards.
The next part of my character I wanted to control was the fingers. This is because I will need to change the characters hand movements during the animations.
I however didn’t end up controlling these the same way as the previous controls since I followed a tutorial made by Academic Phoenix Plus to connect the positions of the joints to attributes I added onto the elbow controls that could then be altered and key framed in the attribute editor.
Lastly, I added wrist controls for the character so that I can twist those wrists during my character’s animations since it’s pretty much required for combat and properly controlling the hands.
Weight Painting
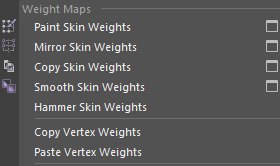
After having all of the rigging and controls set up, we need to adjust how much the movement of the joints affect the movement of the mesh. This will be done by repainting the weight paints by using the “Paint Skin Weights” tool in the Skin menu.
One of the ways weight painting was applied was on the helmet where the strength of the paint, with connection to the head joint, was 100% so that the helmet wouldn’t stretch when rotating it with the neck control. This wouldn’t just be done if the head had solid armor like a helmet but also for all heads even without armor.

Another part of weight paint is making sure that moving a joint don’t affect certain tris that aren’t supposed to be affected by the joint, for example, if the elbow joint had weight paints connected to the character’s hip area.
For these weight paints I mainly focused on the upper body and mostly neglected the lower body during this process which I would later learn was a mistake and would fix.
Reflection
In terms of this section the two ways I would do it differently is to work on the legs more for weight painting so that they wouldn’t distort so much when moving the foot controls and that they wouldn’t stretch anything over the hip joints since I noticed the waists did when working on the first animation.