Greetings and welcome to my Dev Log! Here I will go through my part of creating our team’s Collaborative Game, “Caught Red Handed”.
For our game I’m in charge of Level Design, Implementing everything into the Unity Engine and Programming the game mechanics.
I’ll be splitting my Dev Log into three parts, one to cover everything I do within the project for each of the levels.
Level Design
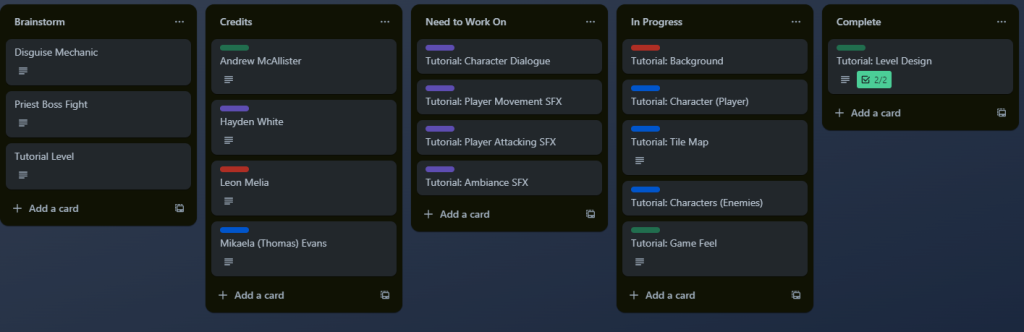
The first thing we did as a group after presenting our idea was to flesh it out more and set up a Trello page to keep track of everything that needs done, at this point we have set up tasks on the page which are required for the tutorial level of the game such as developing the game’s feel, tilemap, character animations, sounds, etc.
After this, I figured creating a block out of the level would be the best first move for me until we have a tilemap made for the tutorial cave. So I used the Paint software on my laptop to draw up what the level will look like and what will be in each room.
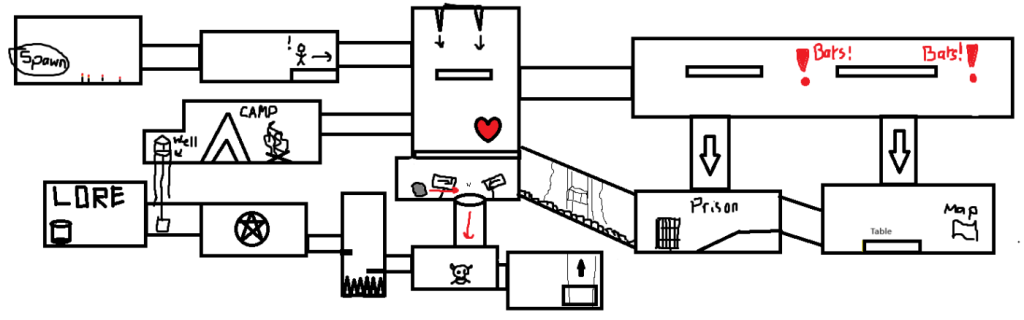
I made the level so that there is a split where the player can go in the third room from spawn. The idea is that the player will encounter a miner in the second room who will run away, and as the player moves the next room they can see the miner moving towards the room with the bats. This encourages the player to go to the area where the map is which will also let the player know there’s more rooms to the left which they would have only discovered if they fell off the platform in room three.
I understood that the holes in the bat room are leaps of faith and may look to be avoided instead of going down into, that’s why I plan for dialogue to appear coming from the first hole to indicate that the fleeing miner went down there before the player caught up, indicating to the player that it’s safe it go down there as well.
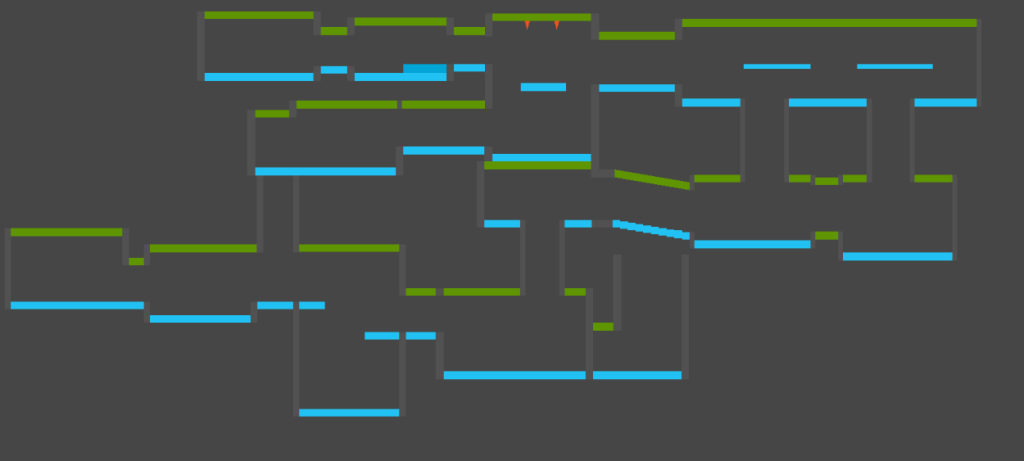
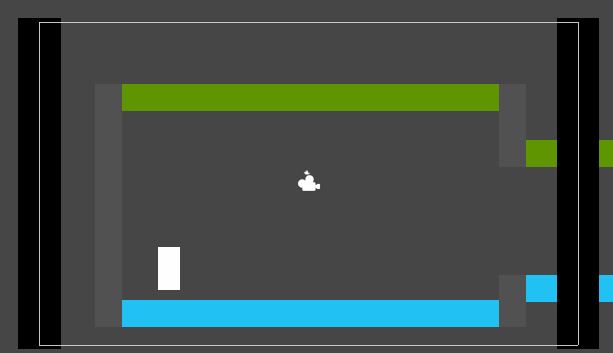
From there I made the block out for the level in Unity:
Room Transitions
This blockout was altered to that it would work with the way the camera will move during the game where it will show only one room at a time.
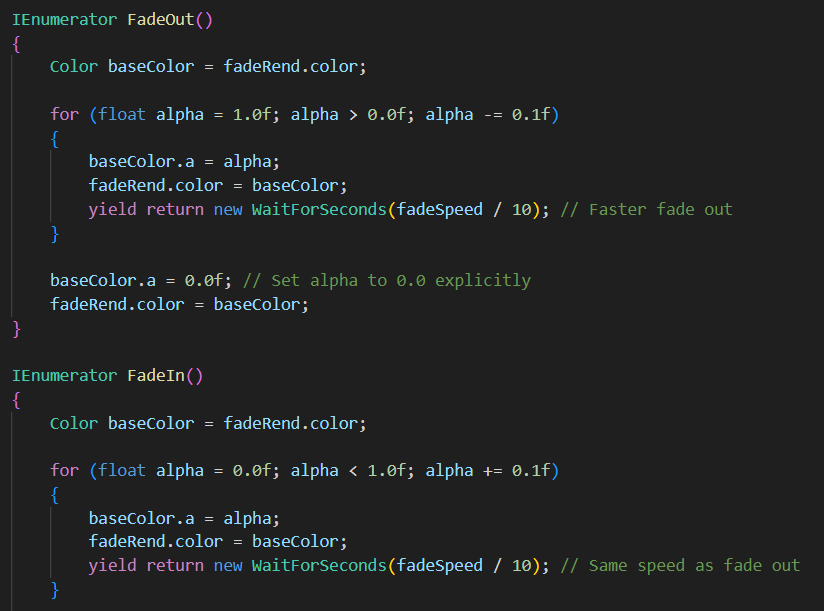
On the topic of cameras, my next step was to make a transition feature to move the camera when the player enters a new room, this involves fading the screen in and out and setting up all the different camera locations. At first, I tried doing this by having a black game object change opacity a little by little over a short amount of time, but it ended up a bit buggy, so I used ChatGPT to help me write a decent fade transition.
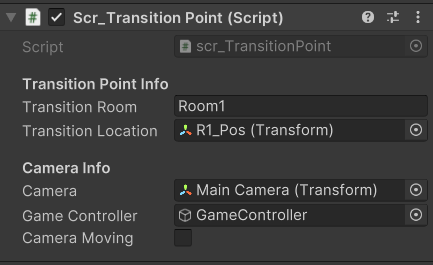
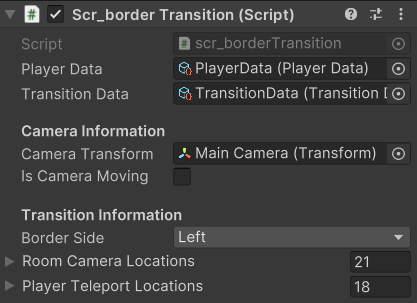
Then I made a script that will be attached to game objects at the entrances of the different rooms and have them transition to the correct room, I tried doing this by creating a public Vector 3 so I can control what coordinates the camera moves to on the script component in the inspector, but for some reason it didn’t work and kept coming up with errors, so instead I made empty game objects at the locations I want the camera to move and set it up so the camera will move to said game objects.

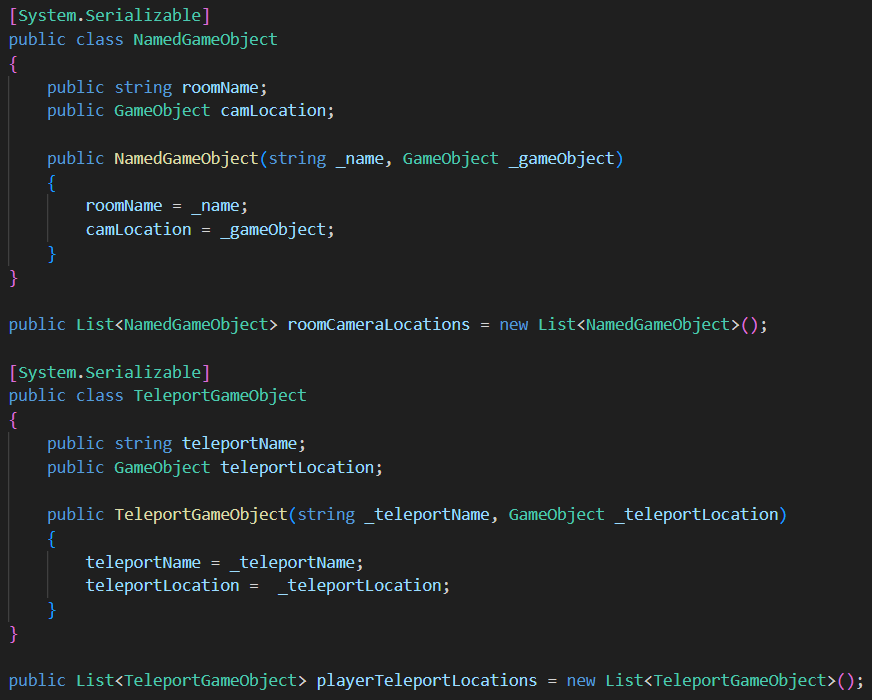
I picked up using serialized fields to create headers in the Inspector while creating different prototype game project. This was from Midnite Oil Software LLC’s tutorial series on how to create a 3D shooter in Unity.
Later on into the level, I used ChatGPT to work up a simple character movement script for testing the transitions and to fix any bugs. This led me to create a transition and control lock to prevent any game breaking loops when the player moves room from room. However, it didn’t fix the issues completely.
What’s where I decided to scrap the current script and create a new one that didn’t use empty game objects with box colliders at the rooms’ exits and entrances and instead used the borders that I had had connected to the main camera.
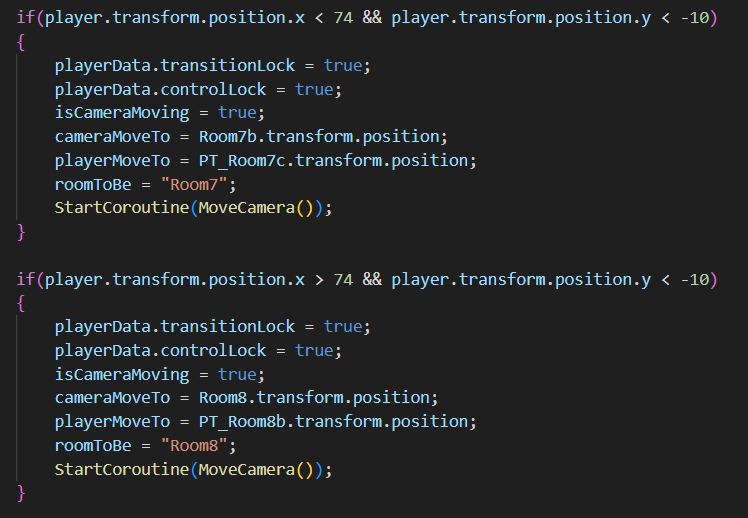
These borders where originally used to frame the camera but I figured out that I could attach the box colliders to them and transition when the player reached them, this meant I didn’t need as many game objects and it would prevent loops since the main issue last time was when transitioning the player, they would enter into a different box collider and it would move rooms again immediately, but with this it was easier to teleport the player outside any transition box colliders.
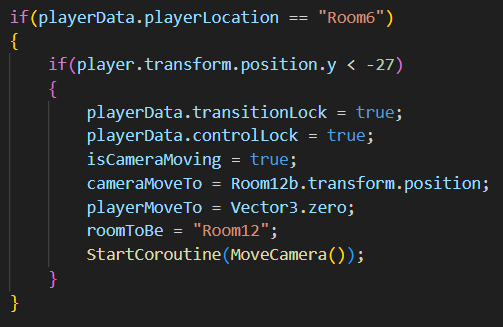
So, with this new script I needed to collect the data of where to move both the camera and player when they move to a different room which meant I had to track the which room the player was in at the time and use that to direct which rooms the borders will take the player.
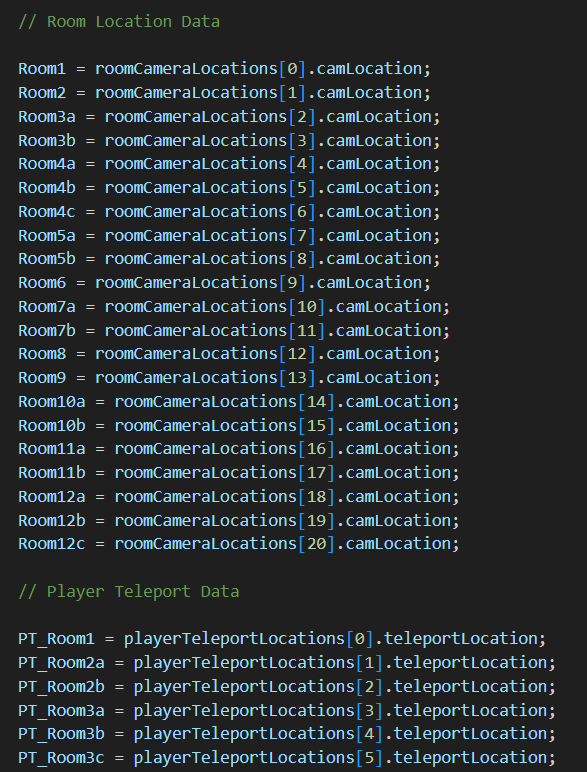

Implementing Player Animations
I was able to get the animations for the player from Mikaela and imported them into the scene. The animation frames were very well done, however I noticed that some of the frames for the animations weren’t all centred, so I decided to fix that.
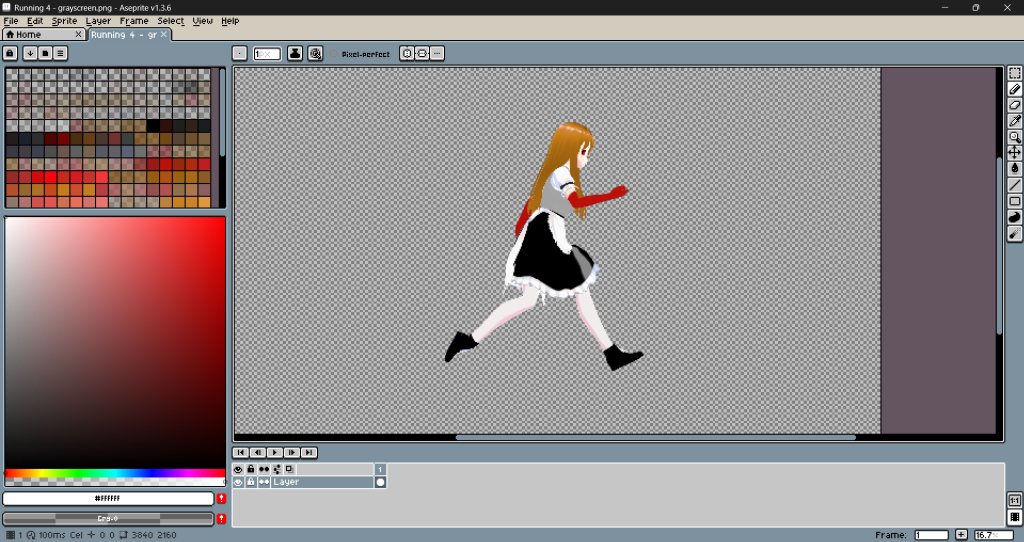
This involved finding how much I had to move by both their x and y axes the frames and then save them. I decided to do this on Aseprite even though it’s really used for pixel art since I could work on it without needing to go to the lab buildings to use photoshop.
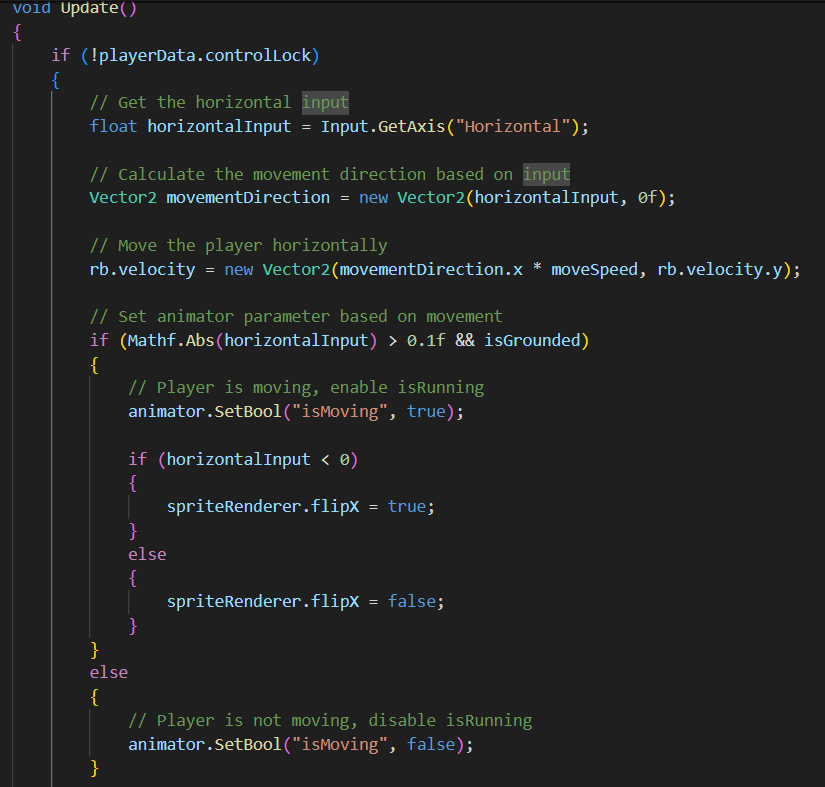
I pulled all of the frames into the animation window in Unity and made the animations, making sure to set the transition times all to 0 so the movement between animations were instant.
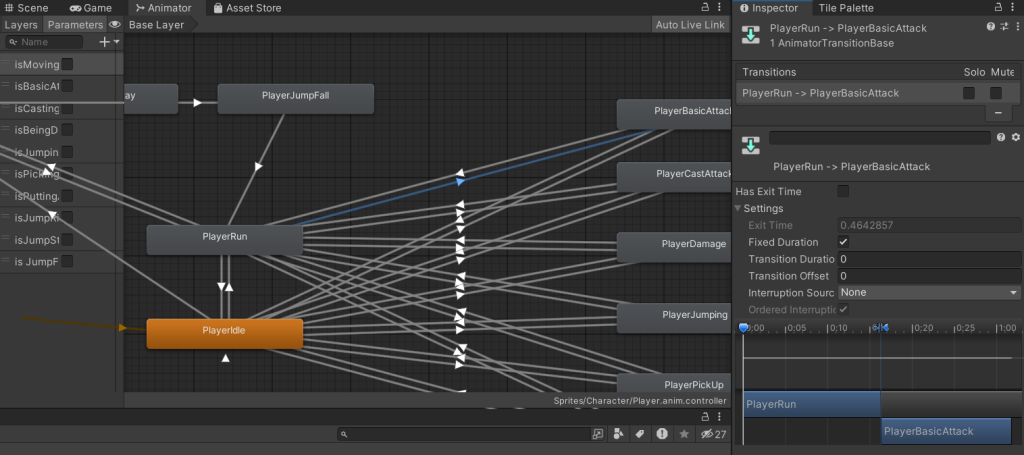
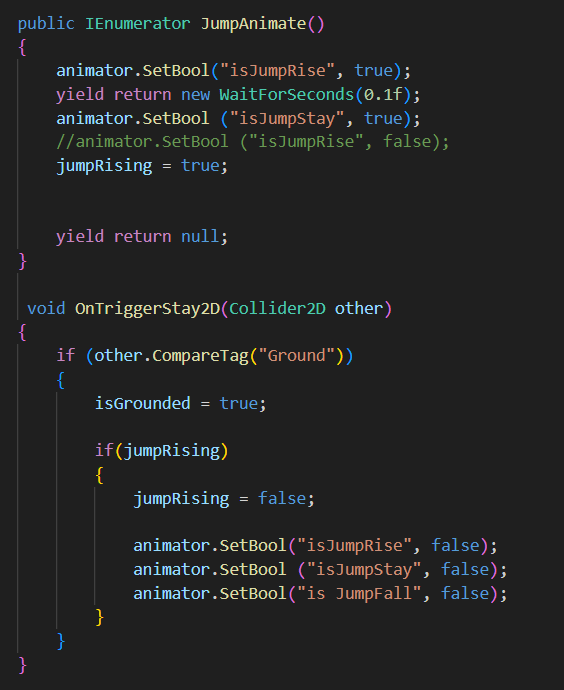
Bools were also set up in the animator so I could control what animations play within the movement script.
I attached a ground check empty gameObject onto the bottom of the character to check if she was grounded or not in order so detect when the jump animations should play and to activate the running animation if the player was grounded and moving.
Position-Based Transitions
I had the order transitions set up, but what about the transitions that aren’t triggered by reaching the border gameObjects but instead are based on the player’s positions in certain rooms?
This is most important in rooms that are larger than the camera can show, so I added a new function in the transition script called Camera TP_Check which tracked the player position when in more than one camera rooms and when the player position passed a certain threshold it will teleport the camera to a new position.
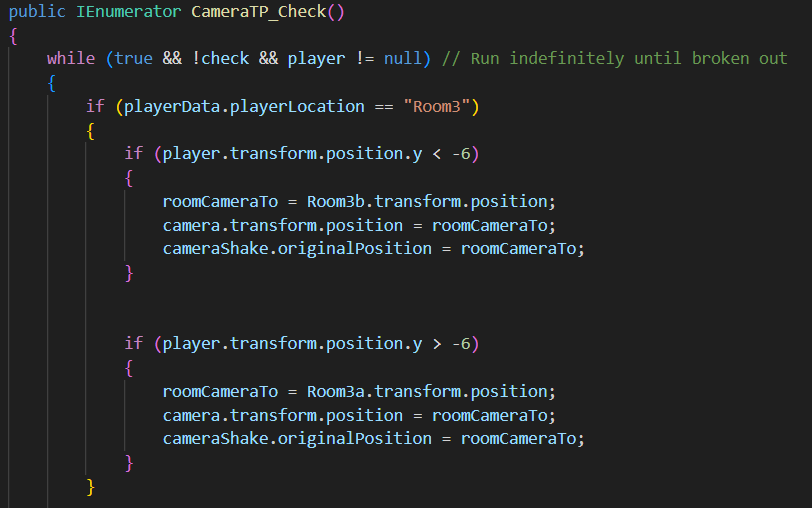
The check bool was required since there were two borders which had this script and I couldn’t have the function running twice at the same time especially when it came to fade in and fade out transitions based on player position.
These are for some of the holes the player can fall down that lead to the rooms below.
Dialogue System
The next step was the dialogue system, which was especially painful to create. The dialogue system is used to display the narrative and messages to the player, but before creating a script I needed a dialogue box and a font.
For the dialogue box I used Pxiel Art UI borders by GX310 on itch.io and the text I used was Elegant Typewriter on Dafont.com.

Ok, now that we’ve got some dialogue assets picked out, next is to make the script.
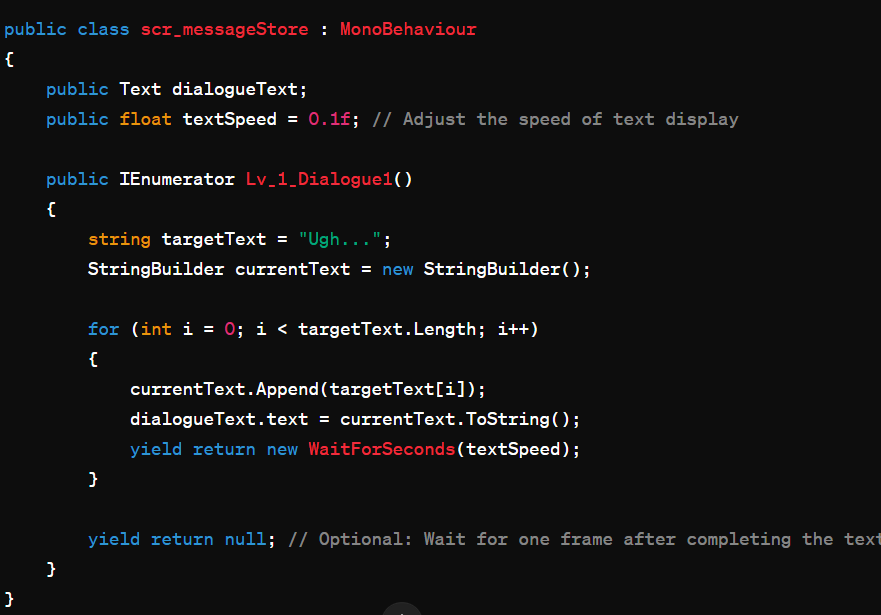
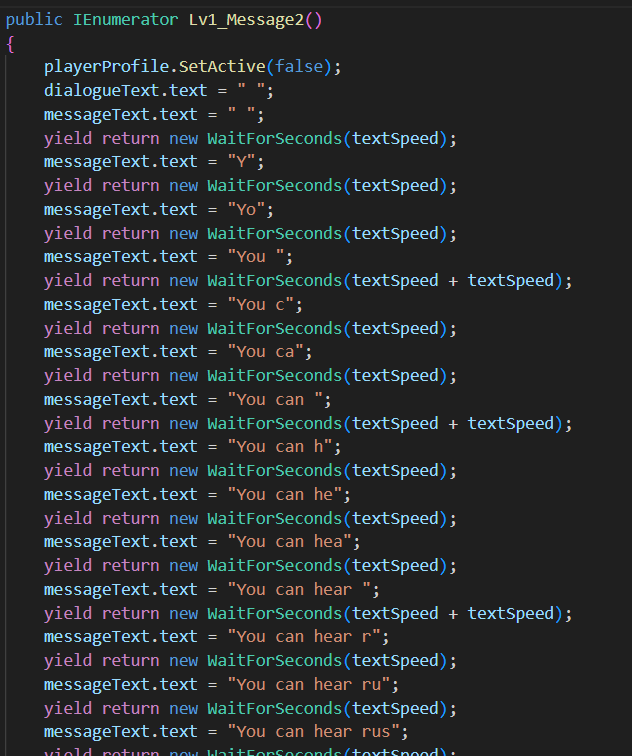
The script that will be used to be a storage of all the dialogue and messages is scr_message storage which has the IEnumerators that will display the text one letter at a time. A game where this is used is Undertale, which has that typewriter-like effect along with some text sounds but we won’t be adding that yet.
This is how the script works:
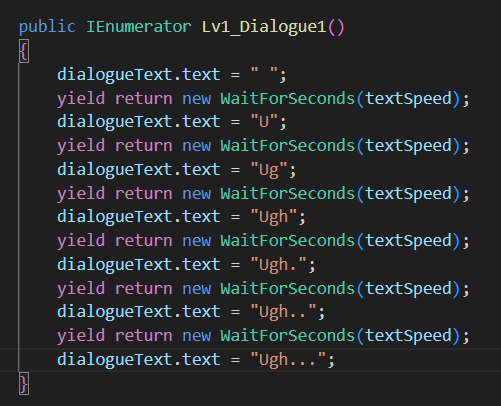
There is a WaitForSeconds code line in between each added letter with the variable textSpeed inside, this variable can be changed in the inspector so the textSpeed can be changed easily if needed and with the added bonus to use the variable in other scripts since it’s public.
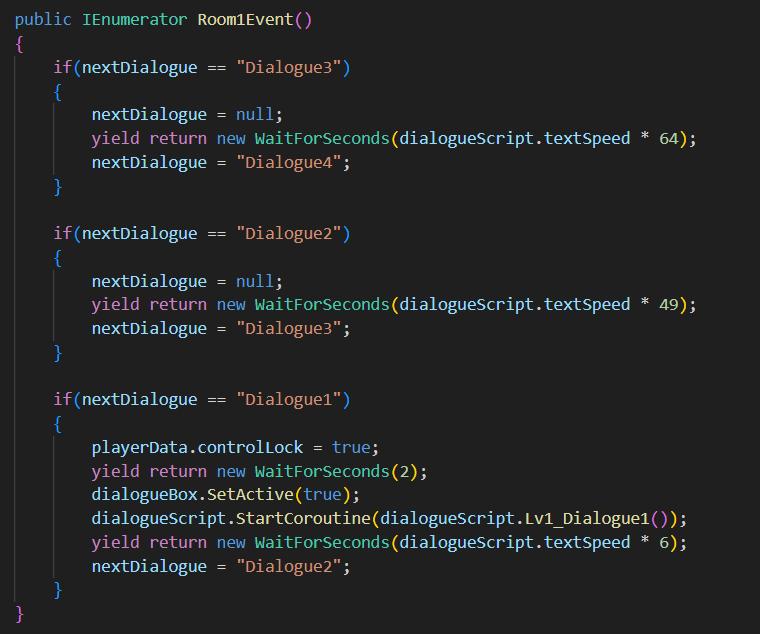
This IEnumerator calls for the dialogue script which is the scr_messageStore. Each time the dialogue is called the script waits textSpeed multiplied by each character in the dialogue text.
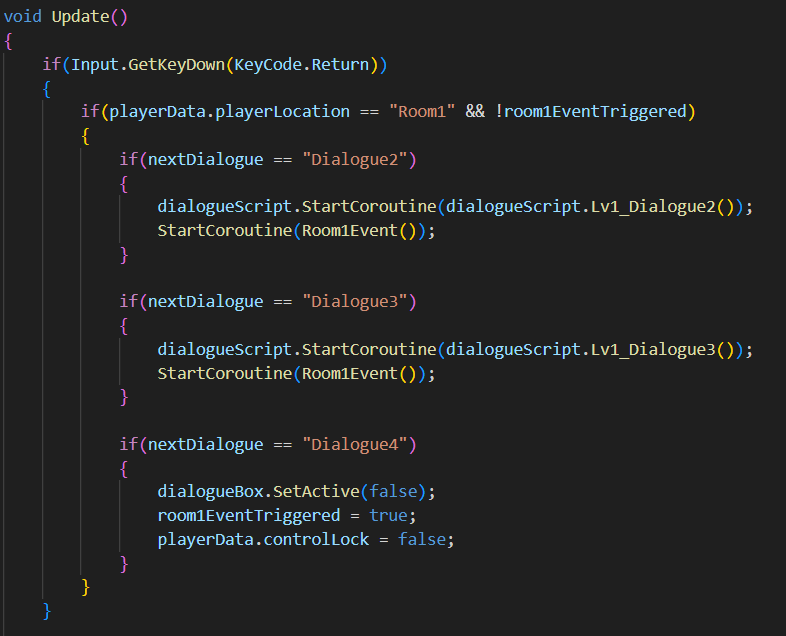
For the Room 1 event, the next dialogue is triggered when the enter key is is pressed by the player until the fourth press and the player is allowed to move by disabling the control lock.
Messages
The messages are held in the same scr_messageStore but they use a different text in the hierarchy since the messages won’t include portraits of the characters in the final game unlike the dialogue which will.

Just to note, all of the dialogue was written by Hayden and given to me to implement. This process involved me in liaising with him to get a broad flow of the level and how it would be connected with it’s narrative. This started of with providing him the level block-out, what each of the rooms are for and what should happen, this collaboration helped me plan out the game’s cutscenes.
The messages in the messageStore script were simple texts written by me to provide non-narrative information to the player.
Health Restore and Upgrades
Next up is the health restore and upgrades. The game will have two total items revolving around health an those are an item that restores health and an item the increases the max health. First thing I worked on was the animations for the items, and what the idea was that the items would be floating up and down. I did this by changing the y position in the animation window and have the animation loop.
One issue I found with this was when using the animation on a different item in a different location within the scene it will snap to the location the animation was first set up. To counter this, I attached the upgrade to an empty game object and changed the y position in relation to the empty. This means I can move the upgrade to a different location by moving the empty.

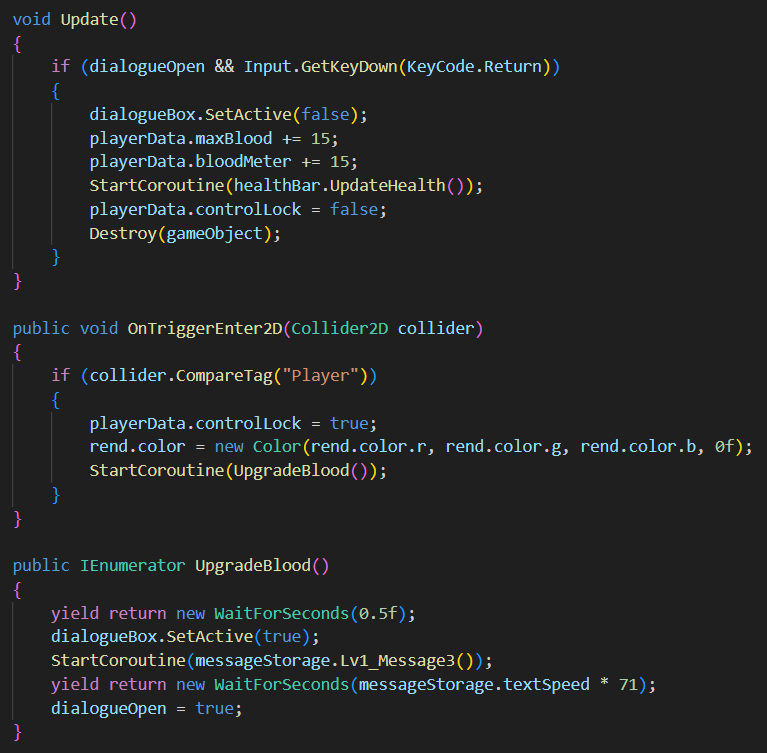
For the health restore script, I have it to just increase the health when it collides with the player, but with the upgrade max health script there’s a message connected to it so it can directly tell what the upgrade does since it may not completely clear even when a health bar is implemented.

Bats and Spikes
I then added (as the heading suggests) bats and spikes into the level.
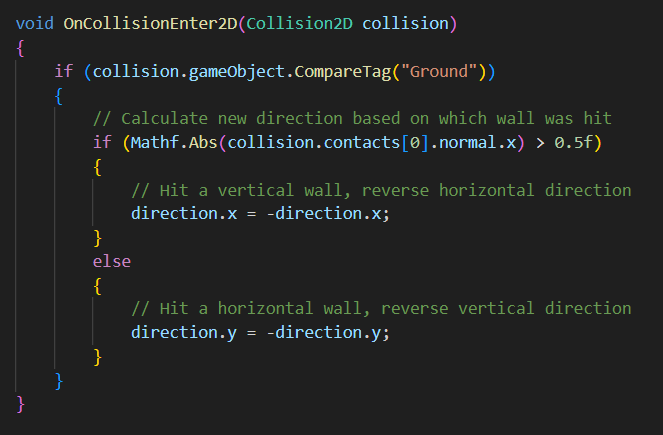
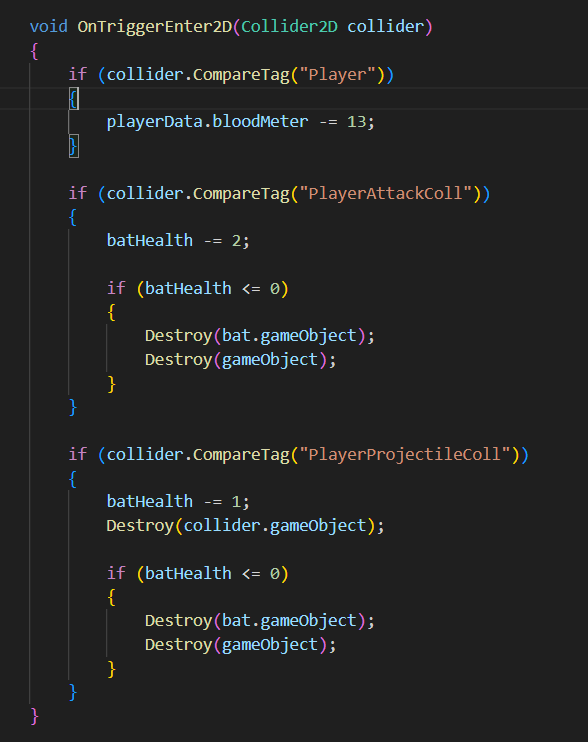
For the bats, I decided that their movement would work by having them bounce off the walls, ceiling and ground of the room they were in, and have them only moving when the player is in the same room; information that is provided by the playerData scriptable object.
For the script I wrote the code for damaging the player, dealing with health and detecting player’s location, however the code that involved the bat’s movements was written with the help of ChatGPT since I didn’t know how to work it out.

The sprite animations I got for the bat were from itch.io and were made by PikelSkeys.
After the bat was ready I moved on to creating both falling spikes and a spike pit. For the falling spikes I added a box collider which stretch twoard the ground below and then when the player enters the trigger box, the box is disabled and canDamage is enabled then disabling the rigidbody2D y constraints so the spike falls. The spike has a second collision which is the size of the spike itself which when it collides with the player will do damage.

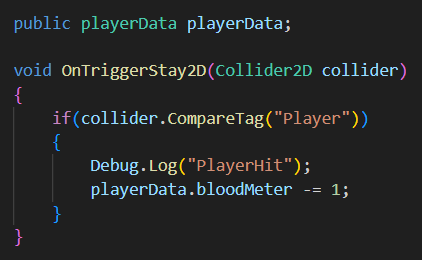
For the spike pit, the script was simply a OnTriggerStay2D function that decreases the player health by 1 every frame they’re collided with it.
Reflection
My only reflection for the first level is that I could have done the message storage script differently by using a StringBuilder to generate the text messages one letter at a time, this was suggested to me by chatGPT but I didn’t end up going through with it since I didn’t know fully how it worked and to avoid technical problems further into the project.