Choosing a Theme
From the four main themes and eight sub themes that were provided, I decided to go with Fantasy and Beauty for my asset since it aligns with the type of media I tend to consume when it comes to Video Games and TV. This also meant that I could create an asset that is from a genre that I’m interested in.
For the main theme, I could have instead gone with Historical since can also be connected with the medieval period of which I was interested in using for this asset, but a large reason why I went with Fantasy instead was because the theme was more open-ended since I could take inspiration from history and then add unhistorical-like elements that are more associated with fiction. As for Beauty, I choose to go with this instead of other options was because I thought it was the best match-up with the main theme and more specifically the middle ages.
Planning and Research
For my 3D asset, I had originally wanted to model a suit of armour with a sword equipped, so I did research on German and Italian Gothic Armour and other European examples.
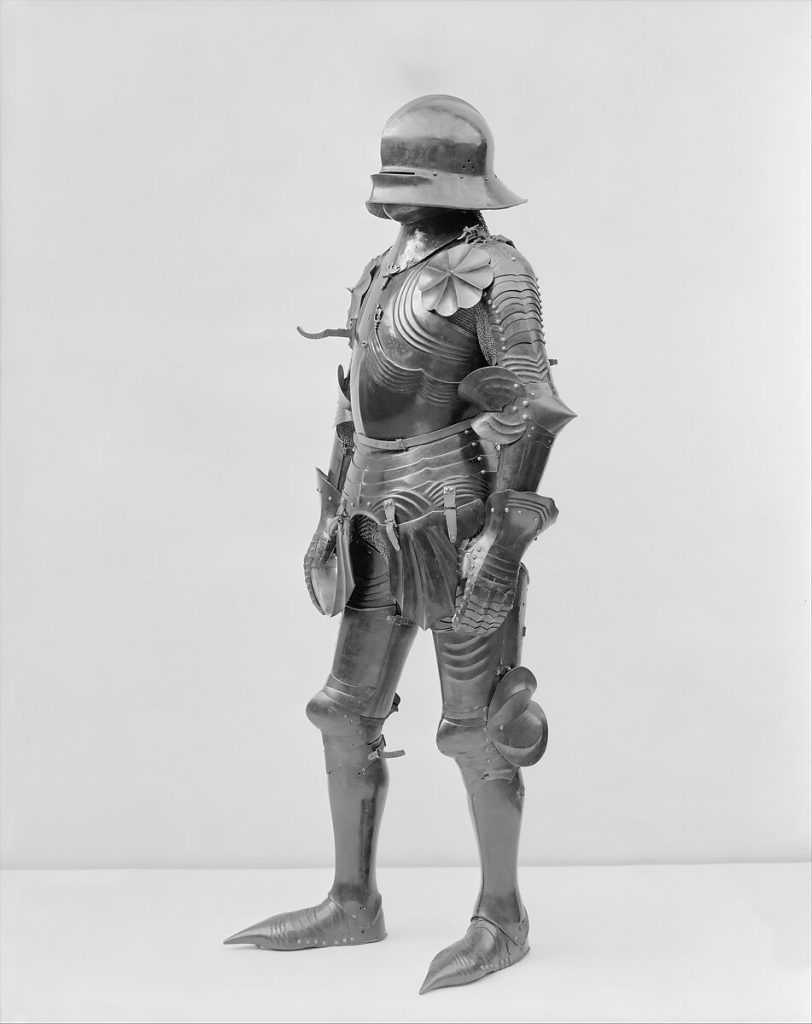
The Metropolitan Museum of Art (n.d) Late 15th Century Gothic Armour [Image]. Found on The Met’s website: https://www.metmuseum.org/art/collection/search/35903 [Date Accessed: 14/02/2023]
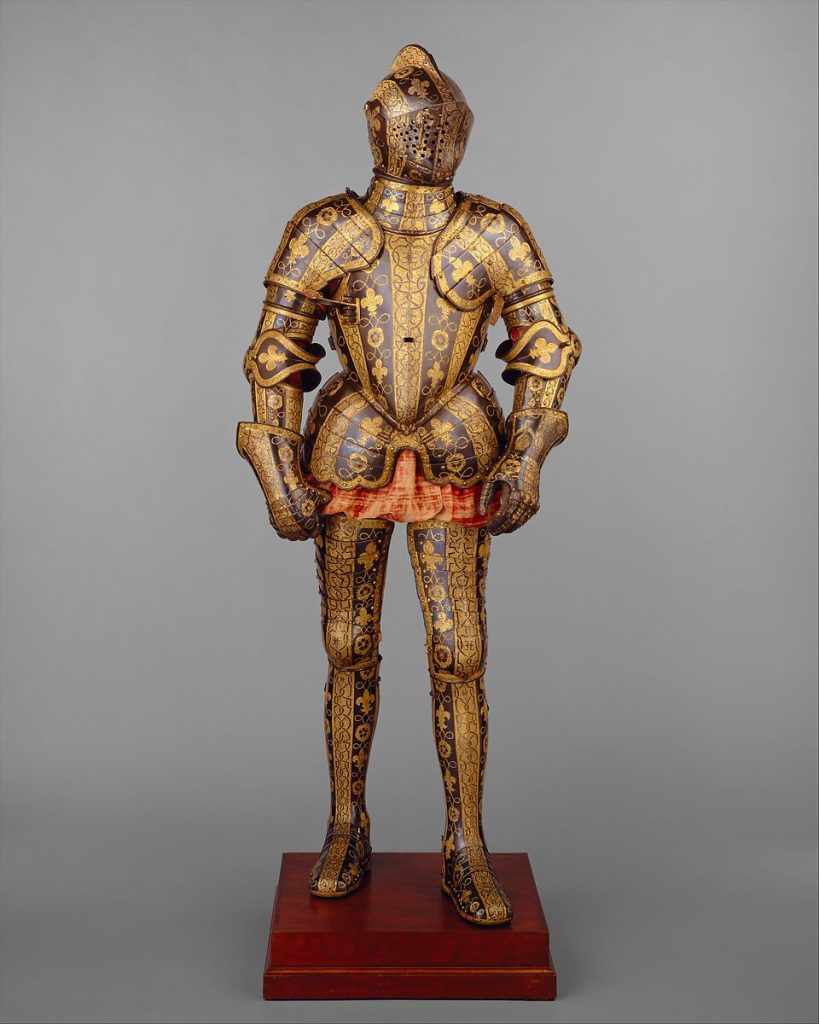
The Metropolitan Museum of Art (n.d) Late 15th Century, Armor Garniture of George Clifford [Image]. Found on The Met’s website: https://www.metmuseum.org/art/collection/search/23939 [Date Accessed: 14/02/2023]
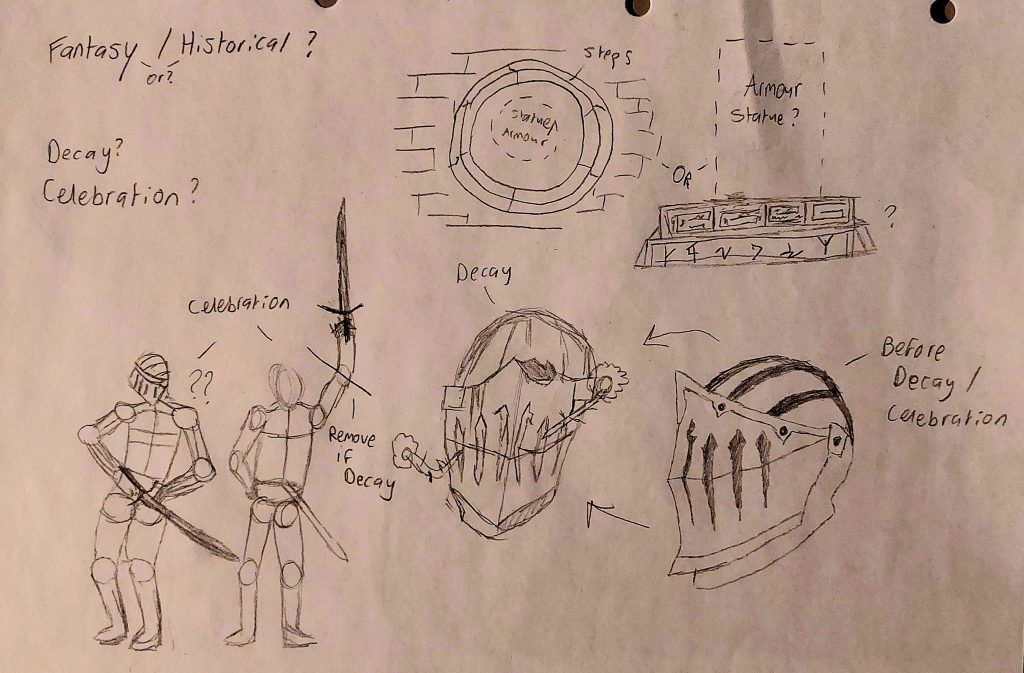
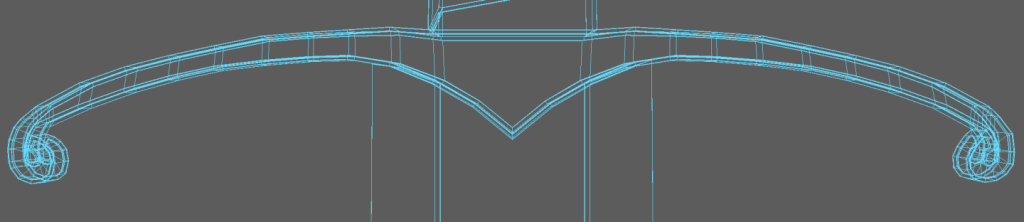
In the early stages of planning I was still exploring different themes for the asset. Possible sub-themes that were considered were decay and celebration for the armour set with the inclusion of a podium. There was also the idea of having the armour set in a pose which can be seen in the concept above.
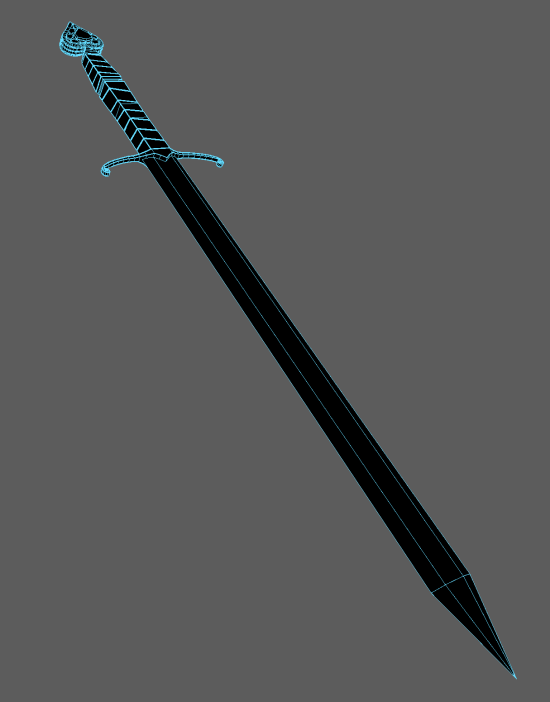
After starting the project in Maya, I had some difficulties with making the model due to a mixture of the complexity of the asset and my lack of experience with Maya and 3D modelling in general. Because of this, I decided on just making the sword model since the design was more friendly to a new user.
Modelling the Asset
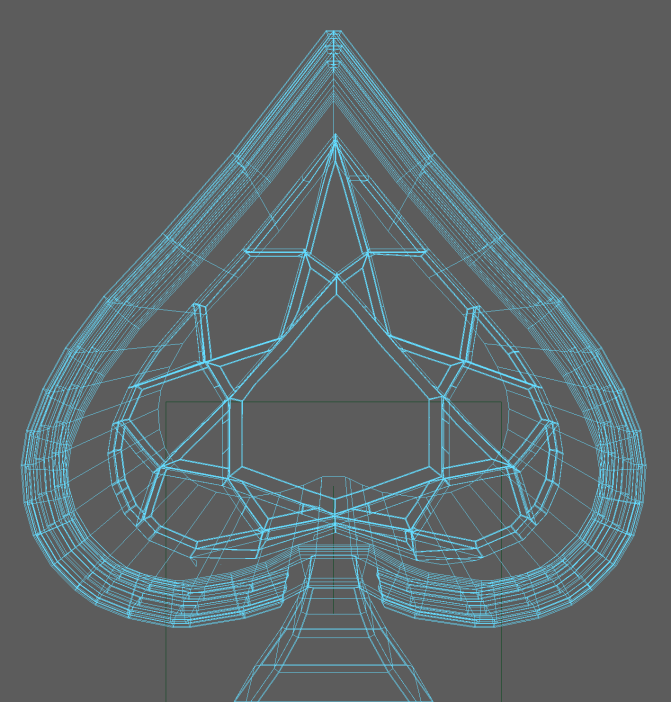
Pommel
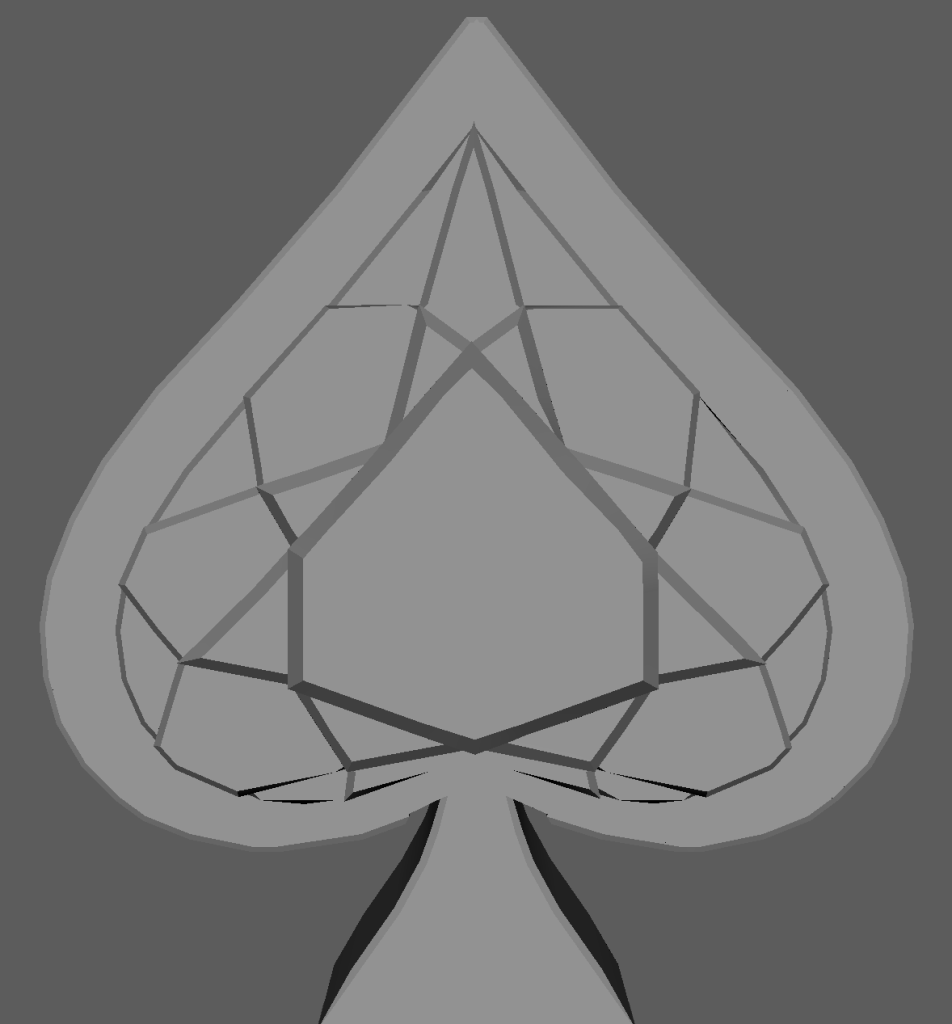
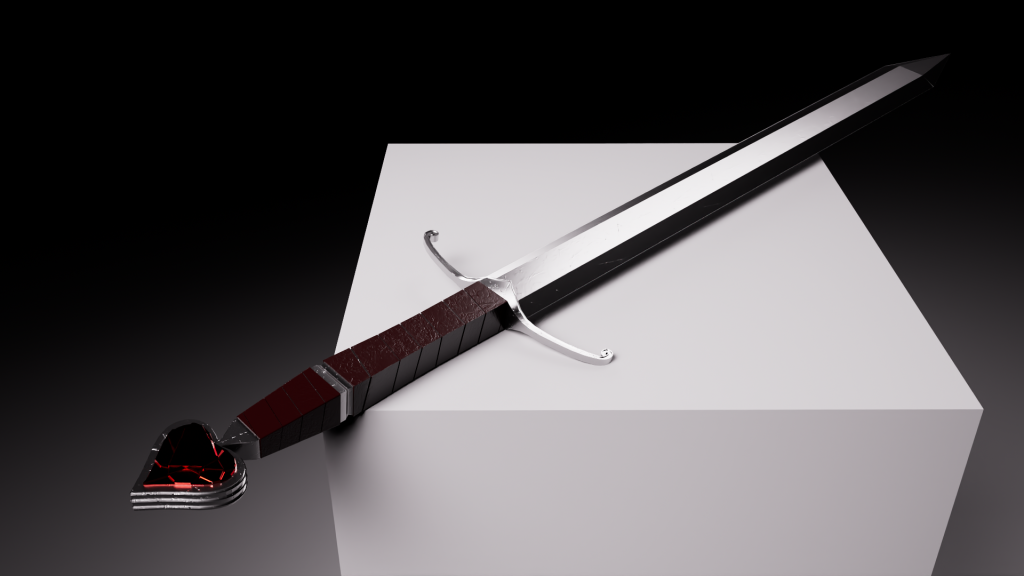
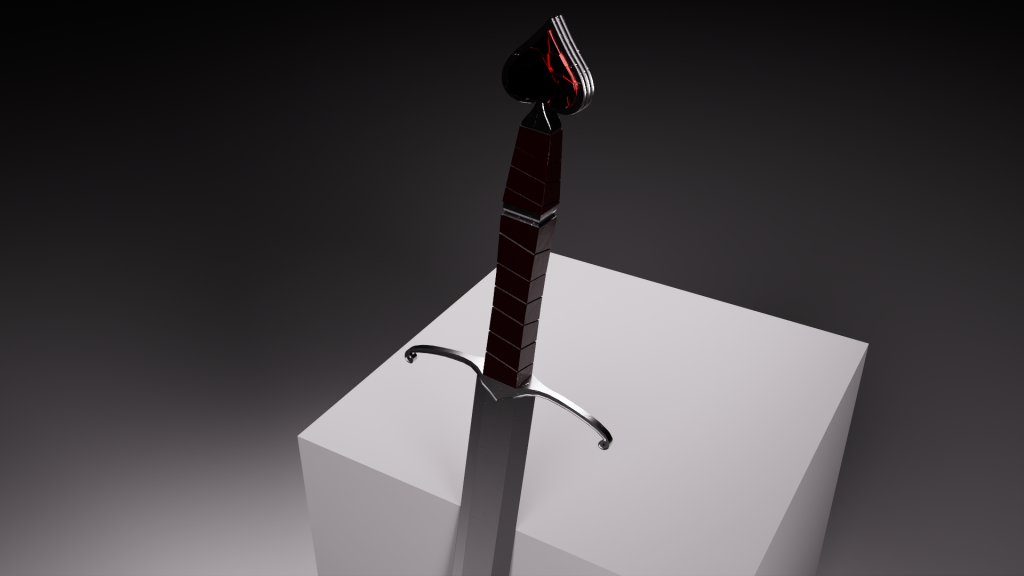
I started to model the sword’s pommel (the end of the hilt) by using a spade from a deck of cards as a reference. I did this by starting off with a cube and scaling from the base of the spade, from there I extruded from there to match the X-Ray of the reference image.
From there, the pommel was looking quite bland so I made the decision to add a gem in the middle of the front side. I pulled a reference of a diamond template and added it to the extruded face of the front and drew the edges of the template using the multi-cut tool to make the faces of the gem. These faces were then extruded outward with the middle being extruded the most and the faces furthest away from the centre extruded the least.
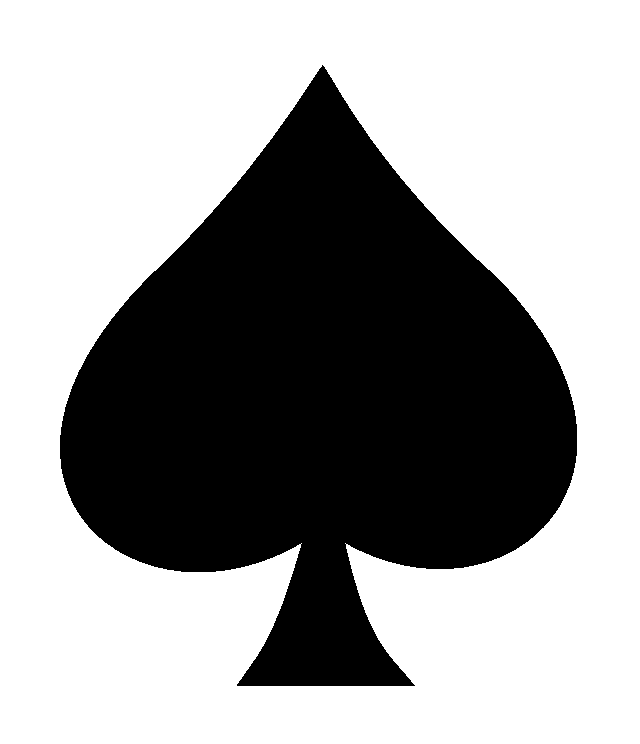
PNG Egg (n.d) Black spade, Spades Suit Playing card Shovel, ace card, leaf, silhouette png [Image]. Found on PNG Egg’s website: www.pngegg.com/en/png-ybthi [Date Accessed: 21/02/2023]
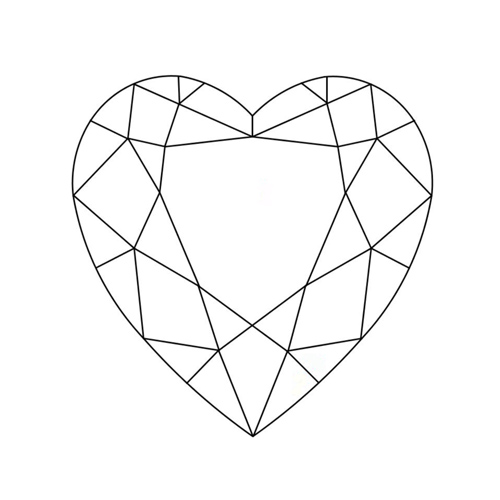
Bryan Boyne (2014) Facet Diagram of a Heart Shape Diamond [Image]. Found on web page of Whiteflash: Ideal Diamonds & Fine Jewelry website: www.whiteflash.com/diamond-education/diamond-shapes/heart-cut/ [Date Accessed: 11/03/2023]
The edges of the gem’s faces were then beveled with one segment as a final touch to make it look more realistic.
After the gem was finished, I added some extrusions coming from the sides of the pommel and adding a small bevel to those as well. And finally, I added a dip on the back face and added a smoother bevel to that. Both of these additions to the model made the pommel more visually interesting.
Handle
I worked my way down from the bottom of the pommel to start to model the handle, the plan for the handle was to have two areas to grip onto, one for each hand to have both to have leather strapped around them. I extruded downwards and came to a stop for the first grip area to end, adding an area of where the metal isn’t covered by leather and then continued with an extrude that was longer than the first. After the handle was finished I worked on the cross-guard, but I had to make the straps first.
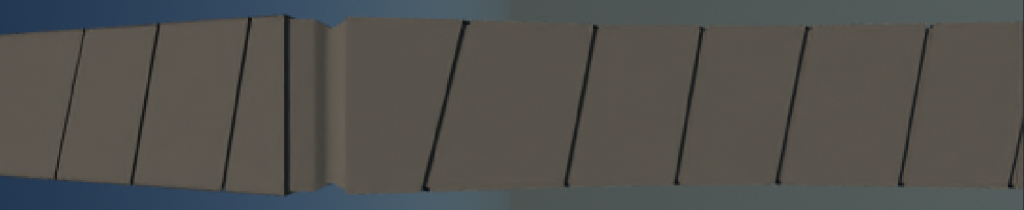
I used the multi-cut tool to draw diagonal edges that would start from the beginning of each strap to the end. When doing this, I ensured that there was a gap to show the metal after each wrap around of the leather. I then extruded each of the faces the multi-cut made outwards. I finally then added a bevel to the edges of the leather with four segments to smooth it out a bit.
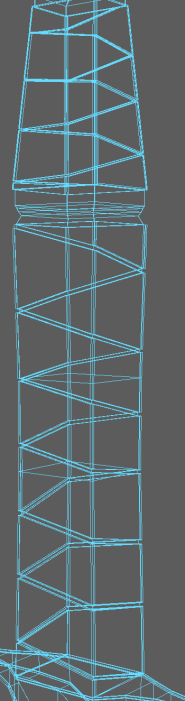
Cross-guard
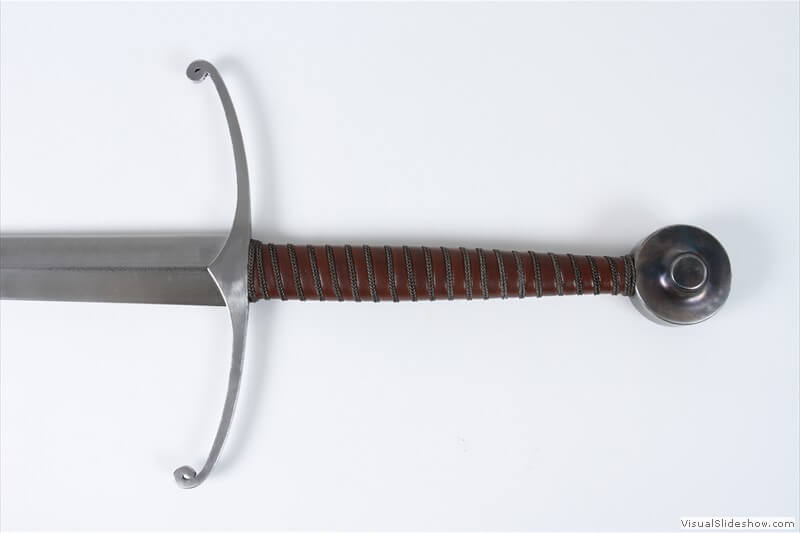
Regenyei Armory (n.d) Longsword – No. 26 [Image]. Found on Regenyei Armory Online Store: regenyei.com/product/longsword-26/#blade [Date Accessed: 28/03/2023]
For the sword’s cross-guard I had to extrude outwards from the handle and then extrude from the result’s sides. I used a reference image for this part of the sword again and used the X-Ray feature to align the extrusions with the image. To make sure the cross-guard symmetrical, I had to extrude the faces from each side at the same time so that the position and scaling of the cross-guard matched.
Once the shape of the cross-guard was done, I made an offset on the front and back faces and moved them inwards slightly into the model.

Blade
The blade was the most simple of the sword parts to create in Maya. I cut a rectangle with a small width on the end of the cross-guard and extruded it to take up around two thirds of the total model’s length. I made the second extrusion, stretched it outwards and scaled it to the point of the swords blade.

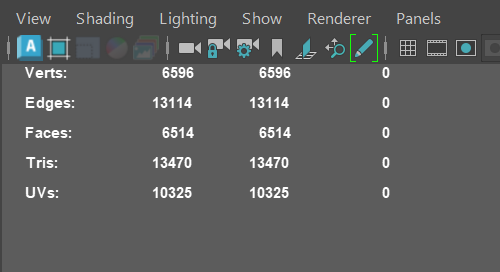
After the base model was finished, I needed to add edge loops to the faces of the blade, cross-guard and ruby so that the edges came out right in substance painter. I also needed to fix a lot of the vertexes on the model since some areas where I used to multi-cut tool to draw edges and ended up deleting had left behind the vertexes, causing some issues with the fbx. model in substance.
The tri amount for the final mesh was 13,470 since there were only a few areas on the mesh where I could face depth using baking, which also meant that I only have one model instead of having a lot poly model and a high poly model.
UV Mapping
After the edge loops and the model was fixed, I used the automatic unwrap function in the UV editor on the model. With the results, I separated the UV shells by which material will be used for them in substance painter which consisted of the Ruby, the Leather Straps, the metal material for the Hilt and the Blade.
A problem I had with UV mapping was that small shells appeared that I was unable to find of the model, and since I didn’t want to break anything I ended up leaving them in the UV map.
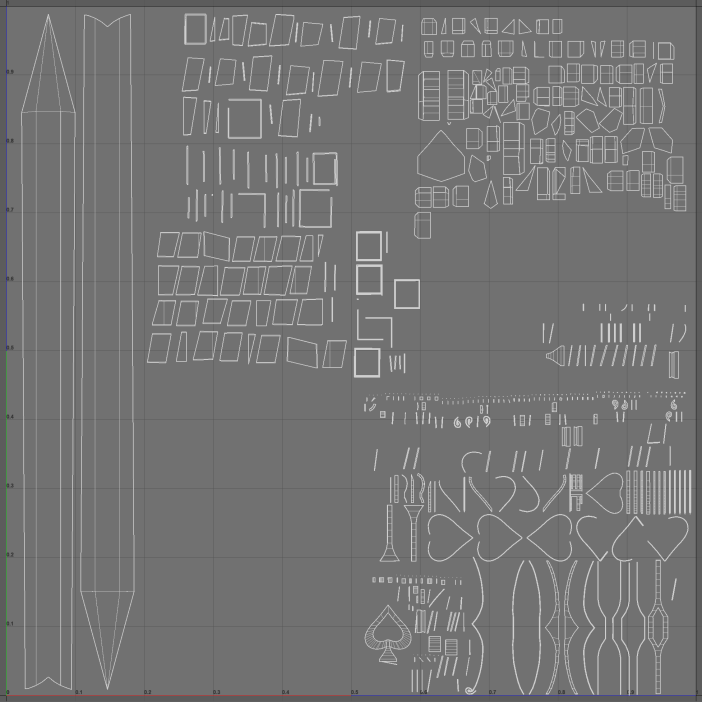
The UV shells were then scaled up to fill more space while making sure they didn’t overlap when I re-positioned them, but from it’s current state, I believe I could have done better so that there was no more empty space left on the map.
Substance Painter & Texturing
Before exporting the model into substance painter, I assigned each part of the sword that will be using different materials with a different AI Standard Surface material each. This is because Substance Painter will recognise these materials as separate in Substance’s texture list, meaning that the materials applied won’t overlap.
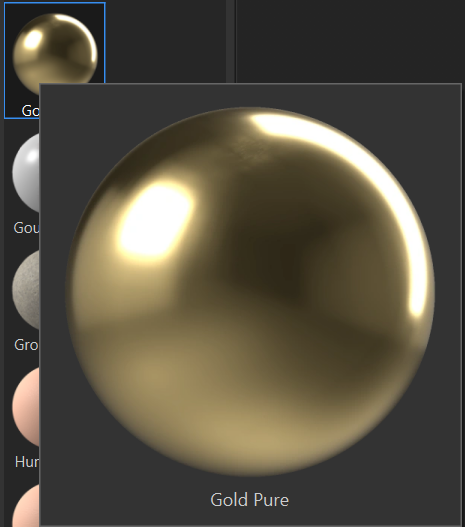
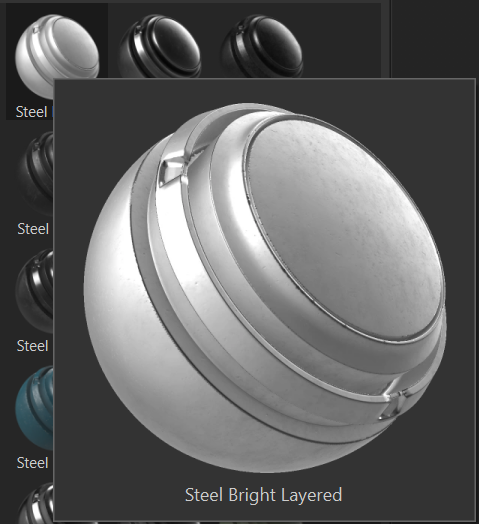
The three materials I used in Substance was Pure Gold, Artificial Leather and the smart material, Bright Layered Steel.

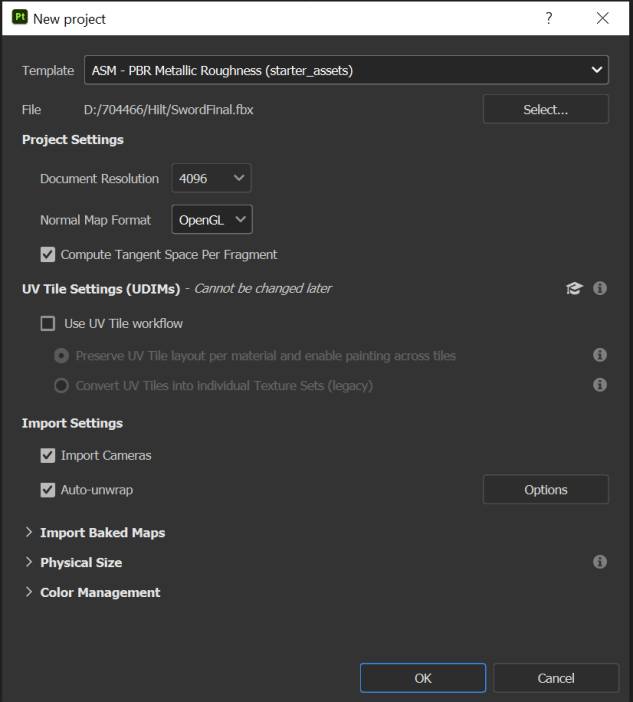
When creating the project in substance, I added the fbx. file with a PBR Metallic Roughness template as seen below. I also set 4K Document Resolution and changed the Normal Map format to OpenGL since that works best when working with projects from Maya.
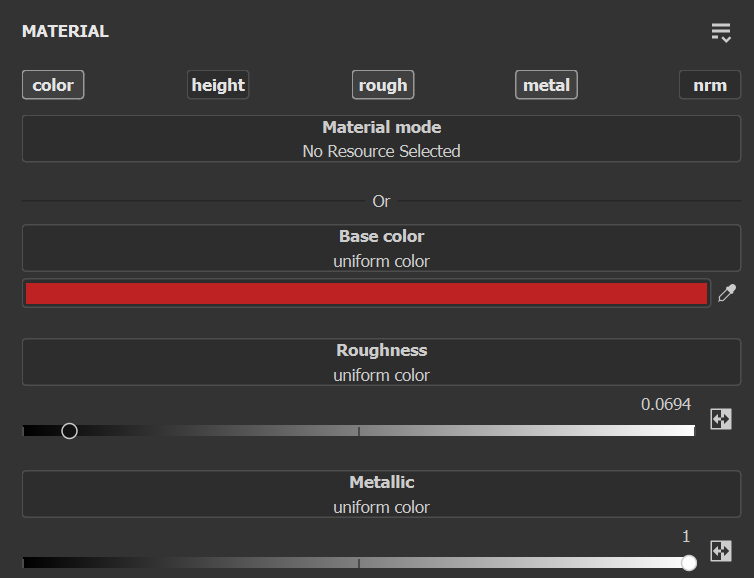
I made modifications to the Gold, Leather and Steel materials used for the textures so that they better fit the model. I used gold for the ruby part of the sword because it was the best substitute since substance doesn’t have a gem material. With the gold material I changed the base colour to a bright red and reduced the roughness to add shine.
The base colour of the leather straps where also changed from it’s default black to a dark brown, and after applied the steel smart material to the hilt and blade, applied a lower roughness to add shine like with the ruby and reduced the amount of scratches on the hilt’s texture.
I then exported the textures from substance painter and imported them onto the sword mesh by selecting each of the texture files and attaching them onto their corresponding materials.
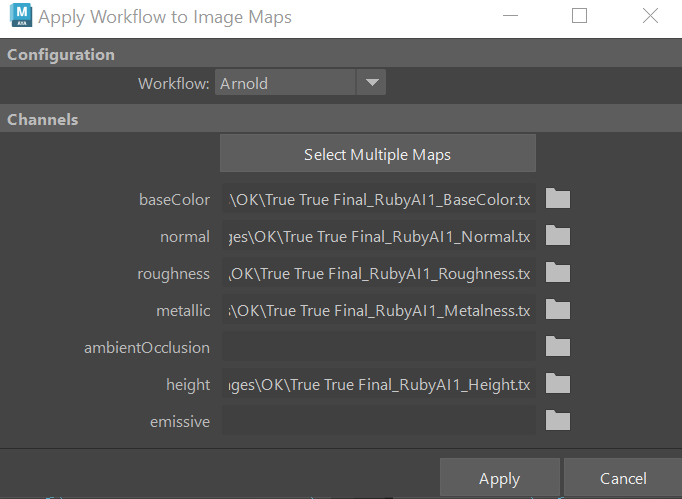
I then added the texture maps to the AIStandardSurface materials from Arnold and then applied them to each part of the model.
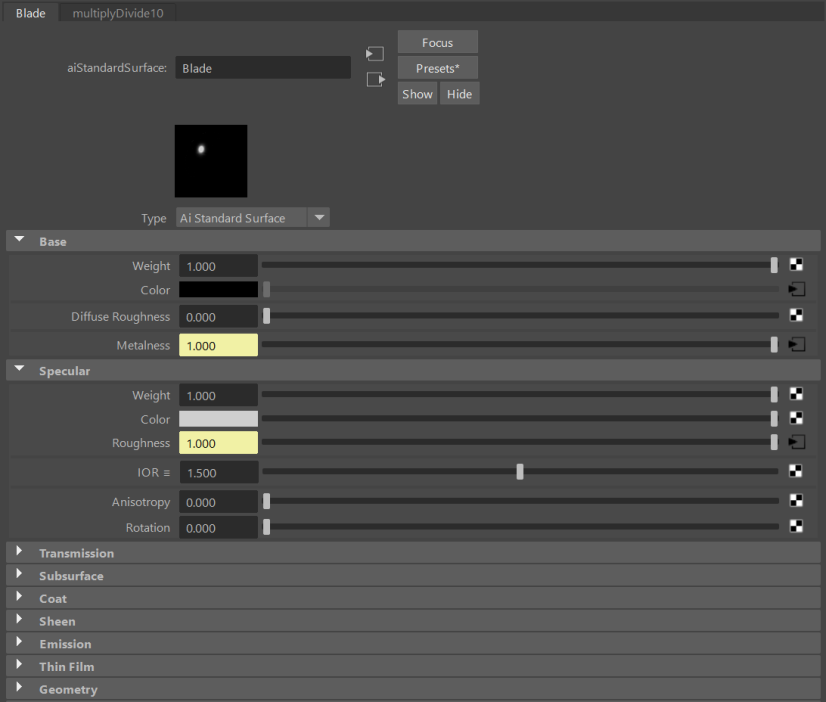
It took some time to discover why the textures made my model dark in the view port menu, and it was because of the metalness texture since the map’s metalness scale is indicated by how dark or light the map is.
Rendering with Arnold
Once the textures were on the mesh, all I had left to do was render the asset using Arnold Renderer.
I set the image size preset to HD_1080 to produce high quality renders and set the image format to tif.
I then set up my asset in different positions with different camera angles, after which I added light sources so that the model can be seen my the renderer.

After rendering my beauty shots, I set up a turn table in the project using Maya’s animation section so that I could render a sequence that shows the full rotation of the mesh. I chose to render the sequence at 25fps instead of 30fps to cut down on render time, resulting in me needing to render only around 500 frames. I made sure to include on each part of the model for the video so that the viewer can see everything.
I imported the frames into Adobe Premiere and exported it as an mp4 file and uploaded to YouTube.
What I would Change?
At this point, the only thing I would change about my asset is to change the blade by making it longer so that it better represents a two-handed weapon like a longsword which the handle adopts by providing who areas to hold onto when wielding. I would also add an indent running from the middle of the blade which some of the swords I’ve researched featured.