Week six’s task was to make a pixel art character for my platformer game and draw frames for the character’s animation that would be used for it in Unity. For my pixel art I wanted to make something simple since I wasn’t confident that I would be able to make a character with human anatomy at this time. And because of this is why I decided to make a slime player character for my platformer game since it is a common creature in many fantasy RPGs meaning that there would be a lot of references to familiarise myself with.
The Design Process…
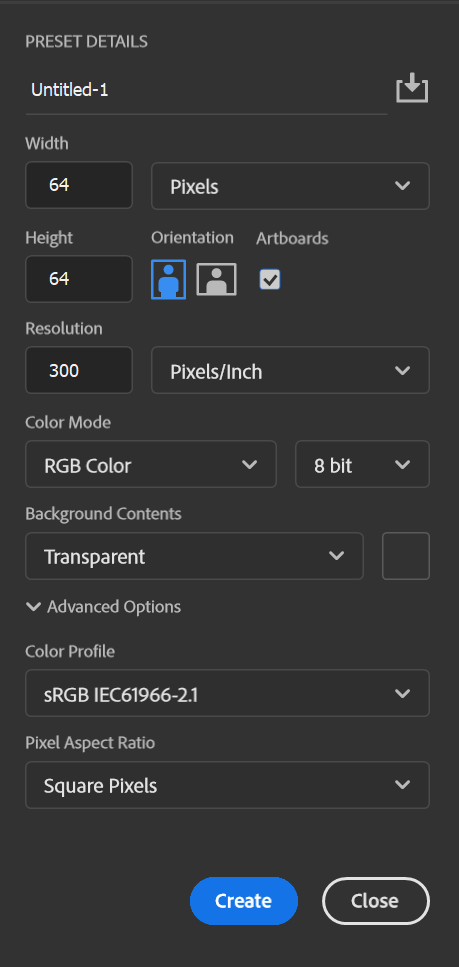
I started with opening Photoshop and creating a new file with a 64×64 pixel resolution, 8 bit colour and with artboards enabled.
This file also had a transparent background so that I wouldn’t have to delete the background manually later within the task.
I searched the internet for references from games like Stardew Valley by Eric Barone Terreria by Andrew Spinks but the sprites used in these games didn’t correspond of what I had in mind of my character.
So instead of using a reference I decided on making my character without one. I started with drawing a circle for the outline and raised the height a bit and made the outline flatter near the bottom of the sprite to better represent the creature’s texture and material.
After I was done with the outline, I filled the shape with the Paint Bucket Tool with the colour green since it is an iconic slime aesthetic. I then changed the colour of the outline to a darker green and used that same colour for the sprite’s shading and a lighter green to shade the opposite end of the slime to that there is an established light source for the image.
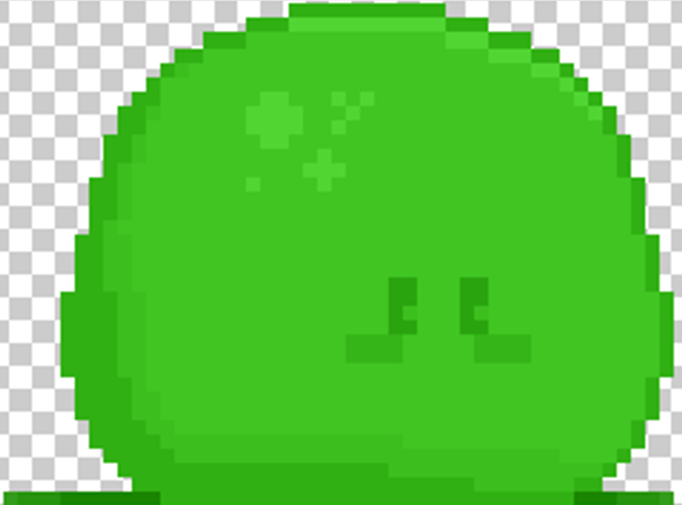
I then added eyes and shadow to the slime’s design. The addition of eyes and blush for the sprite gives it seem sentient and alive which allows players the chance to develop an emotional connection to the character. This is unlike my idea for the enemies for my
prototype which won’t have any facial features like the player, which makes the enemies unable to have a personality and have the entire purpose of being a hazard to the player.
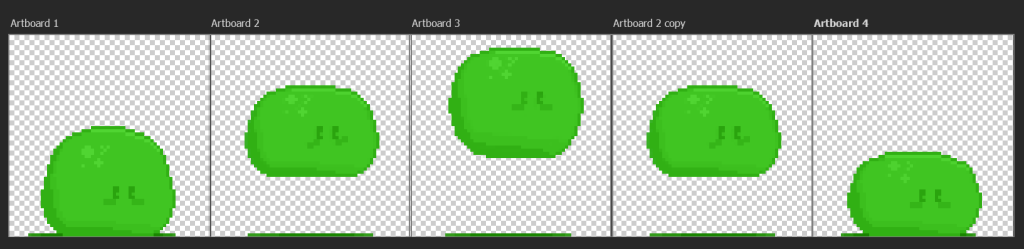
After I was done with the first sprite, I had to make two others for the slime’s jumping animation. I did this by copying the first sprite as a new layer, moving the new layer to the next artboard and using the free transform tool on the edit tab within Photoshop and stretching that layer to different heights for the two mid-air frames. I then solidified the outline since this stretching made the image have some pixels that had a lower opacity meaning that the pixel art wasn’t as aesthetically pleasing as the first frame. Lastly, each of the two frames were placed higher on the artboards than the previous and the shadow was moved to the bottom of the image.